


BIOPAC Systems Inc. is a company that produces machines that can test several physiological processes. These include electroencephalography (EEG), electrooculography (EOG), electromyography (EMG), respiratory function, temperature, and heart rate. In addition, they can be used to test grip force!
One of BIOPAC’s machines is the MP150. After buying this expensive piece of equipment, you can buy add-on modules to test some of the functions listed above. These modules can be clicked into the MP150, which can then transmit data collected from the module to a computer. BIOPAC offers some software to read out the signal that the MP150 transmits, but you can also program custom scripts to do cool stuff with the MP150’s data.
This post will teach you how to write those cool scripts in Python. The demonstrations will rely on the PyGaze toolbox, but communications with the MP150 do not rely on this. So you could use your own favourite experiment package (PyGame or PsychoPy, for example). This example will focus on a dynamometer, which is a module that can measure grip force. It provides a handle that participants can squeeze, which earned it the nickname ‘squeezie’ in our lab. However, as far as I can tell, the presented software should work with any other module too.
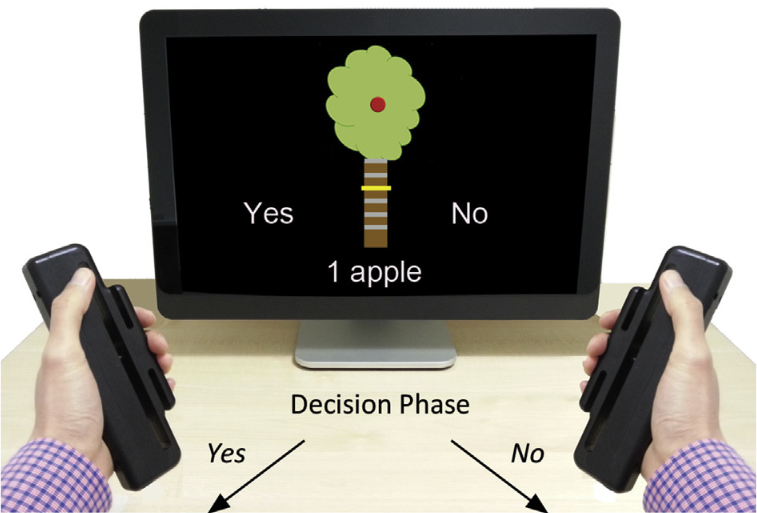
Dynamometers were used in Chong et al.’s study on decision making in Parkinson’s patients.
The above image is from Chong et al. (2015), a study that used dynamometers on healthy people, and on Parkinson’s disease patients on and off their medication. They used squeezing the dynamometer as a manipulation of physical effort. They demonstrate that Parkinson’s patients were less willing to invest effort if they could obtain a low reward for it. On dopaminergic medication, patients were willing to invest even more effort than healthy participants when the rewards were high.
MPy150
BIOPAC provides a DLL (a dynamic-link library) that can be used to communicate with the MP150 on Windows (sorry, not other operating systems supported). It’s called mpdev.dll, and you should have gotten it with your system. If not, no worries: you can download it from my GitHub page, along with the other code presented on this page (see the Downloads section below).
Setting up
The first thing to do, is to import the libraries that you need. For this guide, I will assume that you have PyGaze installed. Create a new folder, and within that folder two new scripts. Call the first constants.py, and the second experiment.py. Then, download the MPy150 zip archive from GitHub. Unzip it, and copy libmpdev.py and mpdev.dll to the folder that contains constants.py and experiment.py
Now that you have the file structure correct, it’s time to start doing some programming. Open constants.py, and define the display type (the underlying package that PyGaze uses for visuals) and the display size (your monitor’s resolution):
|
1 2 3 4 5 |
# The DISPTYPE determines which library PyGaze uses DISPTYPE = 'pygame' # The DISPSIZE should match your resolution! DISPSIZE = (1920, 1090) |
Now open experiment.py, and import the classes that you are going to use (these will automatically find and import your constants.py file):
|
1 2 3 |
from pygaze.libscreen import Display, Screen from pygaze.libinput import Keyboard from libmpdev import MPy150 |
The final step is to initialise a few instances: MPy150 to collect data from the MP150, a Screen for drawing text on, and the Display for showing your Screen:
|
1 2 3 4 5 6 7 8 9 10 11 |
# create a Display to interact with the monitor disp = Display() # create a Screen to draw text on later scr = Screen() # create a Keyboard to catch key presses kb = Keyboard(keylist=['escape'], timeout=1) # create a MPy150 to communicate with a BIOPAC MP150 mp = MP150() |
Getting Samples
If you want to make what is shown of the Screen depend on the input of your MP150, for example if you want to visualise grip force or EEG signal, you will need to actively obtain samples from the MP150. A sample is a single data point, that can contain information on up to sixteen channels (one channel per module). MPy150 is currently configured to only report the first three, but you can easily change this in the source code. (Change the 0s to 1s in line 125.)
To get a sample from the MP150, you can use the sample method. In this example, you will get samples from the MP150 and display their values on the computer monitor. This means you will have to continuously get new samples, and update the display. The easiest way of implementing this in code, is by using a while loop. You can make such a loop go on forever, or until you press a key. The idea here is to make it run until you press Escape. The code looks like this:
|
1 2 3 4 5 6 7 8 9 10 11 12 13 14 15 16 17 18 19 20 21 22 23 24 25 26 27 28 29 30 31 32 33 34 35 36 37 38 39 40 41 |
# set a starting value for key key = None # loop until a key is pressed while key == None: # get a new sample from the MP150 sample = mp.sample() # use the first channel in a string (by using a wildcard) sampletext = "channel 0 = %.3f" % (sample[0]) # Determine the background colour based on the sample # (this ranges between black and bright red). # Sample values usually are between 0 and 1. RGB values # are between 0 (no colour) and 255 (full colour). You # multiply the sample by 255 to get the colour value, # then you make sure it's an integer between 0 and 255. red = int(sample[0] * 255) # Make sure red is between 0 and 255. if red < 0: red = 0 elif red > 255: red = 255 # The other colour values will be 0 green = 0 blue = 0 # Now set the background colour to the new colour. bgc = (red, green, blue) # Fill the Screen with the new background colour... scr.clear(colour=bgc) # ...and write the new sample text (white letters). scr.draw_text(text=sampletext, colour=(255,255,255), fontsize=100) # Now fill the Display with the updated Screen... disp.fill(scr) # ...and update the monitor! disp.show() # Don't forget to check if there is a keypress. key, presstime = kb.get_key() |
This while loop will run until you press Escape. It will show the sample’s value in white letters (on the centre of the Screen, the default text position). And it will update the background to be brighter red if you squeeze the MP150’s dynamometer harder.
Closing Down
After using the MPy150 instance, you need to close it to shut down the connection with the MP150. You also need to close the Display, which will close down the experiment. The following code will do this:
|
1 2 3 4 5 |
# Close the connection with the MP150. mp.close() # End the experiment. disp.close() |
And that’s it! Your whole experiment finished! For another example, that shows you how to record from the MP150 to a log file, see this MPy150 test script on my GitHub.
Downloads
The MPy150 class is completely free and open source. It is hosted on my GitHub page, from where you can also download it. The download is an archive that includes libmpdev.py and mpdev.dll. To use them, unzip the archive and place the files in your PyGaze directory, or in the same directory as your script.
After placing libmpdev.py and mpdev.dll in your PyGaze directory, you can import MPy150 with the following code:
|
1 |
from pygaze.libmpdev import MPy150 |
If you placed libmpdev.py and mpdev.dll in the directory of your script, include the following:
|
1 |
from libmpdev import MPy150 |
What units are the samples? I assume kg?
That’s a very good question! I’m afraid it’s not kilograms, but more-or-less arbitrary units (I think it’s the voltage output from the module). You’ll have to calibrate your system to know what output values correspond to what pressure, for example by placing a known weight on the handle and reading out the difference in the BIOPAC’s output.
Thank you! That makes much more sense
It doesn’t seem to work for channels 4-16. I changed the 0s to 1s in the channel list, but there seems to be other places that it is hardcoded to get only 3 samples
I’m a newbie here. How does the code changes if used in Psychopy?
Pingback: Using the BIOPAC MP160 in Python – PyGaze
Pingback: Real-time recording/analysis of physiological data from BIOPAC in Python – PETER GAMMA (Physiologist), MEDITATION RESEARCH INSTITUTE SWITZERLAND
Pingback: Using the BioPac MP150 in Python – Quantitative Exploration of Development (Q.E.D.)
I try to change the sampling rate but the number of samples I get doesnt fit.
mp.start_recording()
mp.start_recording_to_buffer()
time.sleep(5)
mp.stop_recording_to_buffer()
mp.stop_recording()
arr = mp.get_buffer()
mp.close()
The array should be about 5000 samples and its only 191
It is my understanding that the mpdev library doesn’t allow for high-throughput sampling. Even when running without anything else (i.e. no display), I couldn’t get it over roughly 200 Hz, if I recall correctly.
PS. You might be interested in the updated MPyDev library: https://www.pygaze.org/2018/12/biopac-mp160-in-python/